
-
Microsoft Intune
-
Entra ID
-
- Articles coming soon
-
-
Microsoft Azure
-
Windows
-
Microsoft 365
-
Linux
-
Netværk
-
Other
Part 1: Modern Deployent – Autopilot enrollment and configuration
In this series, I will walk you through building a complete Microsoft Intune setup for Windows devices from the ground up. We’ll cover every stage of the process, including Autopilot configuration, Intune policy management, compliance settings and notifications, and application deployments. I’ll also explore device security and strategies for protecting your cloud-managed devices ranging from Attack Surface Reduction and BitLocker to Windows Hello for Business. Along the way, I’ll share practical tips, tricks, and some of the tools I rely on as an Intune professional to streamline and optimize the process.
What is Autopilot and why do we need it?
Windows Autopilot is Microsoft’s modern deployment solution designed to simplify and secure how organizations provision and manage Windows devices. Instead of relying on traditional “golden image” builds which require IT teams to constantly update operating systems, applications, and configurations Autopilot delivers devices that are built on demand. As soon as a device connects, it automatically receives the latest updates, policies, and applications, ensuring a consistent and secure setup without the overhead of image maintenance.
Beyond simplifying deployment, Autopilot also strengthens device security and ownership control. During initial enrollment, the device is registered to the organization by uploading its hardware hash into Intune. This guarantees that the device cannot be re-registered by unauthorized individuals or used by another company. In short, Autopilot not only simplifies and streamlines device provisioning but also ensures that every Windows device is securely tied to your organization from day one.
How to configure Windows Autopilot
Creating the device group used for the Autopilot profile
One of the most powerful aspects of Windows Autopilot is the ability to define different deployment profiles based on organizational needs. For example, developers may require more flexibility and fewer restrictions compared to the finance department, where stricter policies are necessary.
To achieve this, we can leverage Group Tags and Dynamic Security Groups. A Group Tag is essentially just a label that you assign to a device during its initial enrollment. This tag can be modified later in Intune if needed. Using these tags, we can build Dynamic Security Groups that automatically include devices with specific tags.
Once these groups are in place, they can be used to assign devices to the appropriate deployment profiles in Autopilot. Beyond deployment, the same groups can also be applied when assigning configuration policies, ensuring each department or role receives the correct settings and security settings.
Start by creating a group give it a name, i used DSGD prefix which stands for Dynamic Security Group Device, this allows me to filter and find groups easily even in big tenants with hundreds or thousends of groups. i follow this Prefix by the group type, since this is going to be a group for autopilot devices i will put Autopilot Devices as the name, after this i will specify what autopilot device this is. Use the exact name standard you like this is just my way of doing it.
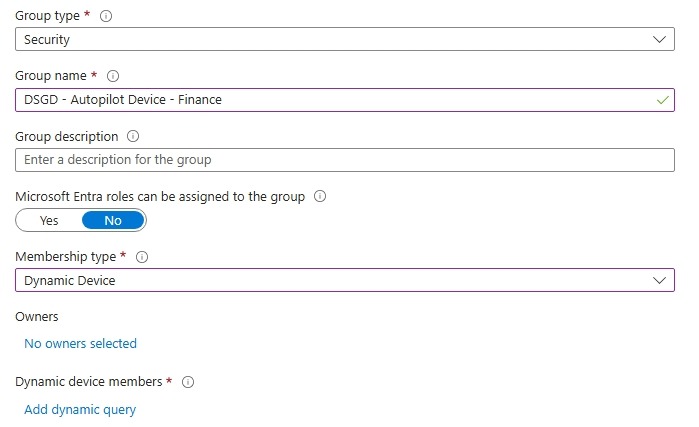
After creating and naming the group click “Add dymanic query” and use the following queries for your group / groups. Use the first query to target a specific group tag, this will ensure all devices enrolled to autopilot with this tag “finance” will be assigned membership to this group.
(device.devicePhysicalIDs -any _ -eq "[OrderID]:finance")The next query will target all Autopilot devices, regardless of any assigned group tags. While Intune includes a built-in “assign to all devices” functionality, you may not be in a fresh tenant but rather in an existing environment that contains other Entra-joined or hybrid-joined devices. To avoid unintentionally applying new configurations and policies i recommend adding this group and use this to ensure we only target our new autopilot devices.
(device.devicePhysicalIDs -any (_ -contains "[ZTDId]"))Setting up the Autopilot profile
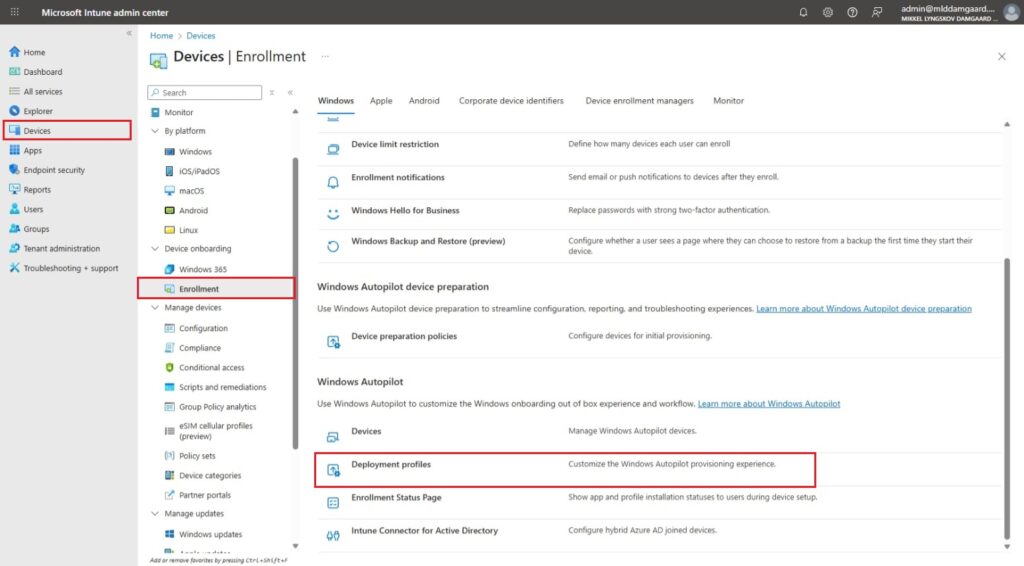
For now its time to headover to the Intune portal. Open Devices from the side panel, Click Enrollment and then Deployment profiles
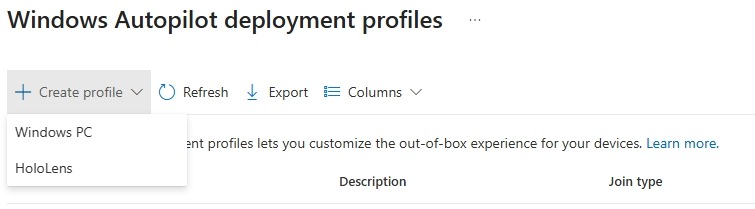
From there click “Create Profile” and select Windows PC
Giv the profile a name i prefer to name the profile similar to what i named my group earlier. You can choose whether to convert all targeted devices to Autopilot or to not its up to you, for this i will stick with “No”.
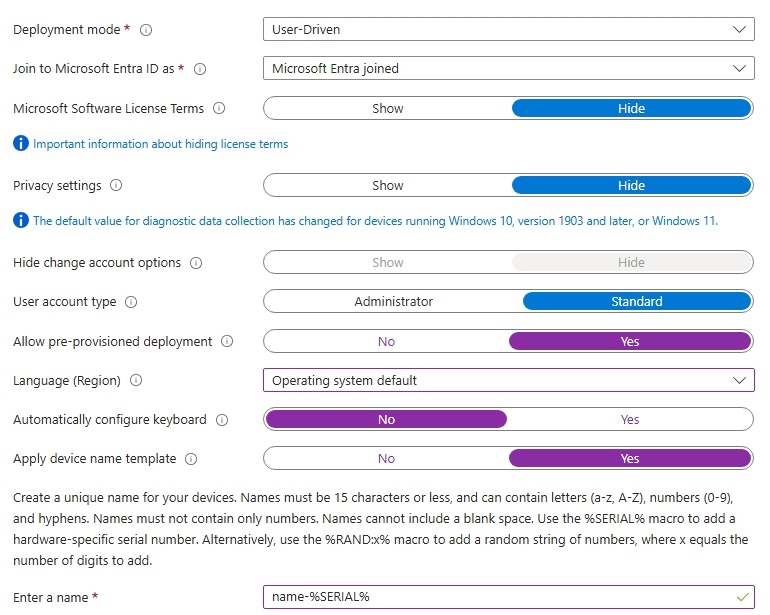
For the OOBE experience i typicly go for these same settings for most of my builds. However you can configure it to your fit your needs. What i typiclly care about is the deployment mode, user account type and device name template. For the device name i typicly go for the short name of my company followed by the device serial number, this is because we ensure no duplicate names and its easy to search and confirm a device from the device list itself.
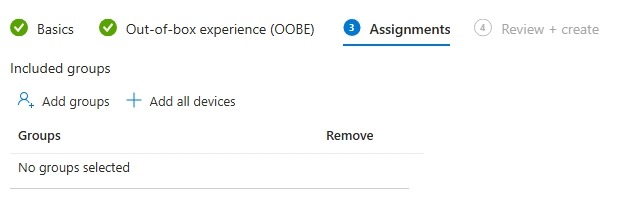
For the assignments go ahead and select the group from earlier with your desired group tag. Click next and select Create.
Configureing the Enrollment Status Page (ESP)
The Enrollment Status Page (ESP) is part of Windows Autopilot, used to ensure a device is properly configured before the user can start using it. ESP monitors the device and displays a status to the user during setup. This helps to make sure all required policies, apps, and settings are applied before the user is allowed acces to the desktop.
ESP helps to achieve the following:
- Ensures compliance: Devices meet corporate policies and security requirements before use.
- Prevents incomplete setups: Users won’t access the desktop until essential apps and configurations are installed.
- Improves user experience: The user is shown a status on the deployment
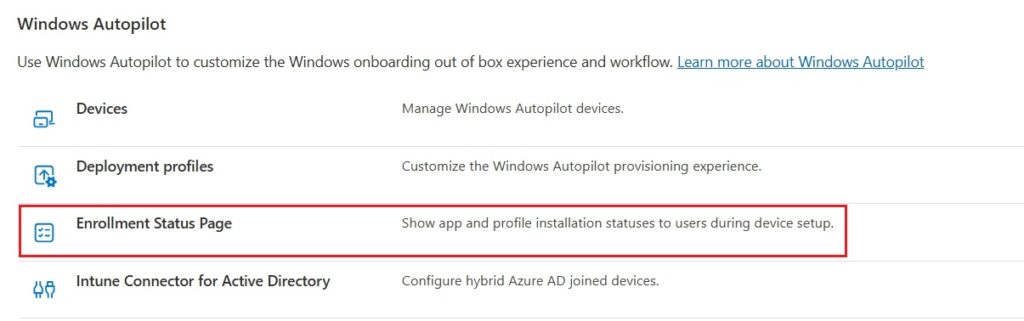
Now for the actual configuration headover to the Windows Enrollment page in Intune and select “Enrollment Status Page” from there click create
Give the status page a name, i gennerally only build one ESP so i normally just name it something Like “Autopilot Default ESP”. Head over to Settings tab, and turn on “Show app and profile configuration progress”
I leave most of these settings as their default, but i Always go for blocking the device until selected apps are installed as shown on the picture below. When selecting apps i focus on selected as few apps as possible this is becoue to minimize the time the user needs to wait before he can start to work. Typicly i go for: Microosft 365 apps, Autopilot branding (im gonna introduce this app later), and PDF reader.
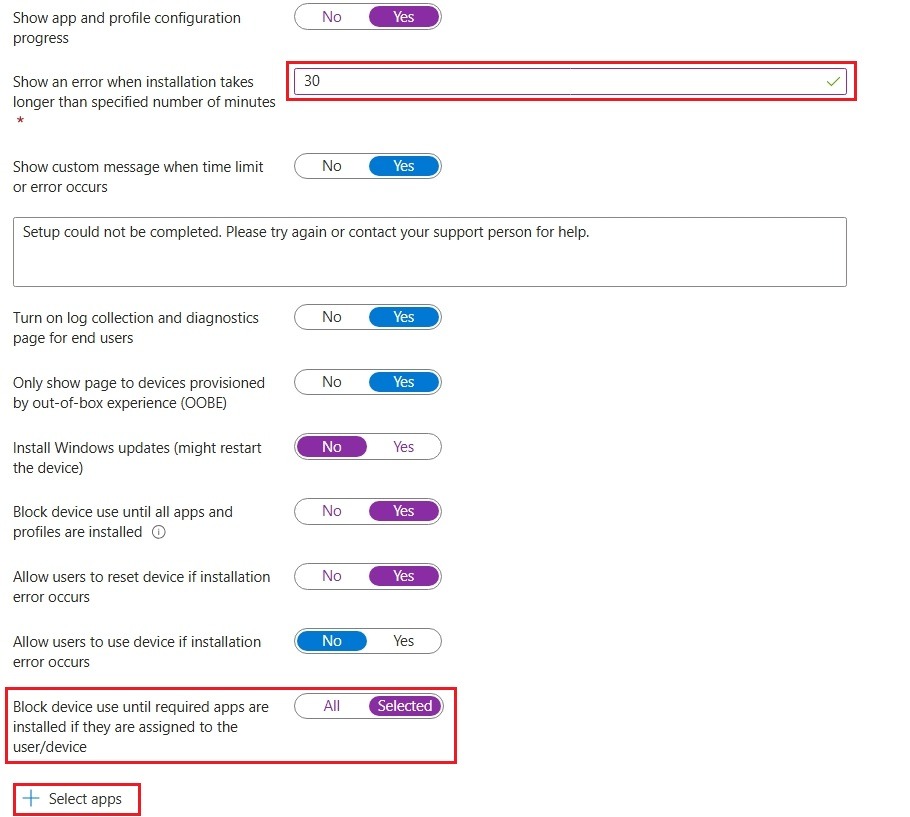
If you plan to pre-provision your devices you can optionally add more apps, i gennerally don’t pre provision that often so i will stick with recommendations for user driven installations without pre provisioning, however you can feel free to add as many apps as you want an pre provision the device its completely up to you.
Summery
Thank you for following this guide on setting up Windows Autopilot. By now, you should be able to configure Autopilot and understand its key uses. I recommend continuing with the series, which provides a comprehensive walkthrough for setting up and configuring Intune, ensuring a complete understanding of device management and deployment.